Here is my take on a pedalboard based on the Ikea GORM.
The GORM is just one of their strange-sounding names for wooden shelving, Swedish I guess. They sell a complete wooded shelving unit and you can also buy extra shelves,
You get 2 shelves in a pack for about $14.00 CDN that measure about, 30″ x 20″ approx.
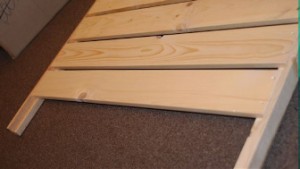
To the left is one of the unpainted shelves with 1 latte removed. You can easily make a pedalboard with fewer boards if you have fewer pedals. You just have to hammer them off the frame and remove the nails.
I took a board off one of the two shelves. I then screwed that board on the back of the other shelf in order to create a slight upward angle.
I used a scrap piece of 2 x 2 wood underneath, and I screwed on both sides to reinforce that backboard.
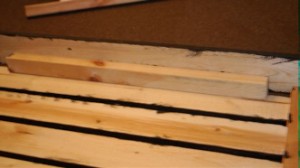
Everything was screwed. I also drilled starter holes so as not to crack the wood.
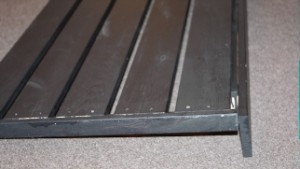
The topsides were painted black with some leftover Tremclad paint.
You can see the extra latte that I screwed to the back to raise the shelf on the back end.
Fastening your pedals without mutilating them
Now I had planned on using Velcro until I started to price industrial strength 2″ packs. Also, I noticed that almost all of my pedals did not have smooth bottoms. I may be stubborn but I hate like heck the thought of mutilating my pedals.
My old pedalboard had plumbing strapping wrapped around the pedals to secure them but I wanted a more elegant and solid solution. I thought of tie-wraps then I stumbled on something I had seen years ago. They were little metal links that look like bicycle chain links. I tried sourcing them without success. Then I found a reference to ” figure 8″ washers used in furniture making.
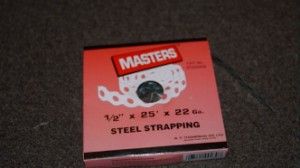
My local hardware stores did not have anything like it. Then I tried I decided to try the plumbing section. This is what I found.
This is a 25′ roll of what looks like figure-eight washers all stuck together.
All I had to do was cut them to size.
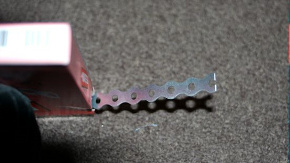
Using a pair of scissors I was able to cut off little sections. They cut like butter. On some of the Roland pedals, I had to trim a bit around the holes so that they would fit nicely.
I was able to attach these to the bottom of all my pedals using the screws that hold the bottoms onto the pedals.
Here is a Boss pedal with the mounts attached. I used # 8, 1/2 ” wood screws to attach the pedals to the GORM.
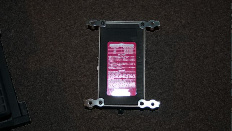
One good idea is to keep a screwdriver with the proper bit so that can remove the pedals if need be, at a gig. This has to be the best and least expensive way to mount your effects pedals without damaging them. Just remove the bottom screws and screw back the screws with the strapping bits.
My completed board.
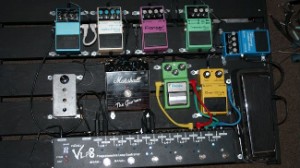
I case you were wondering, the bottom pedal is a VLP-8 programmable loop controller. I don’t think the company exists anymore. There are other brands on the market with what appears as the same unit, different names, different prices, etc. I will do a page soon on loop switching.
Power supply
The pedalboard is powered by a custom power supply that I designed and modified. I will write an article on it shortly. Most pedals draw very little current. My power supply can handle about 1 amp. Next time I’ll probably design one to handle 2 amps.
The Power supply is mounted underneath the pedalboard. It can supply + 9v , -9v and +12 volt using voltage regulators. The 12 volts is required for Roland pedals such as the DD3, Flanger, and Octave. The -9 was for some Craig Anderton projects that required +/- 9 volts.
For the record, I have a College degree in electrotechnology.
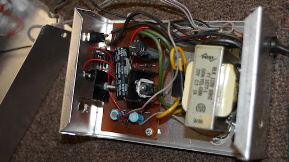
I added a small CPU fan to my power supply as it was overheating in its closed box.
My most recent mod was to remove 1 board in order to make the board a bit more compact.

