
Anamorphic Lenses
What are anamorphic lenses?
An anamorphic lens is used to create that widescreen pro movie look. It was introduced widely as a process called “CinemaScope” by 20th Century Fox. It compresses the horizontal plane while keeping the vertical plane intact. When you look into the front of an anamorphic lens you see the image as shown on the left. When looking through the lens from the back you see an image like on the right. It was used to squeeze a widescreen image onto a standard 35mm film. By using another anamorphic adapter on the standard 35mm projector they were able to expand the image to project it back into a windscreen image.
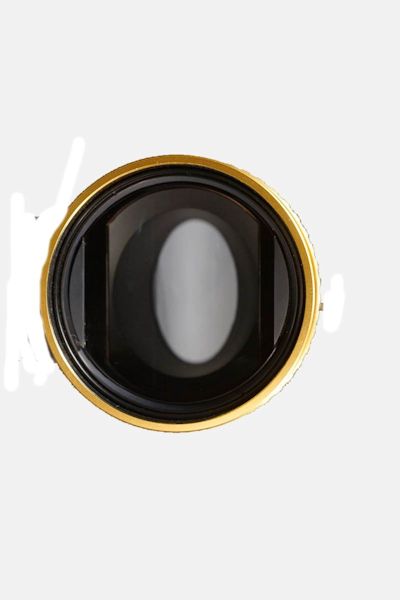
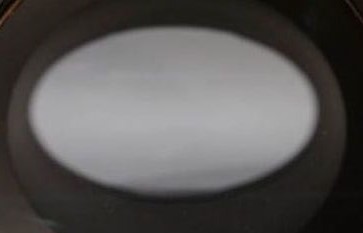
This is an optical illusion because all the lens elements are spherical.
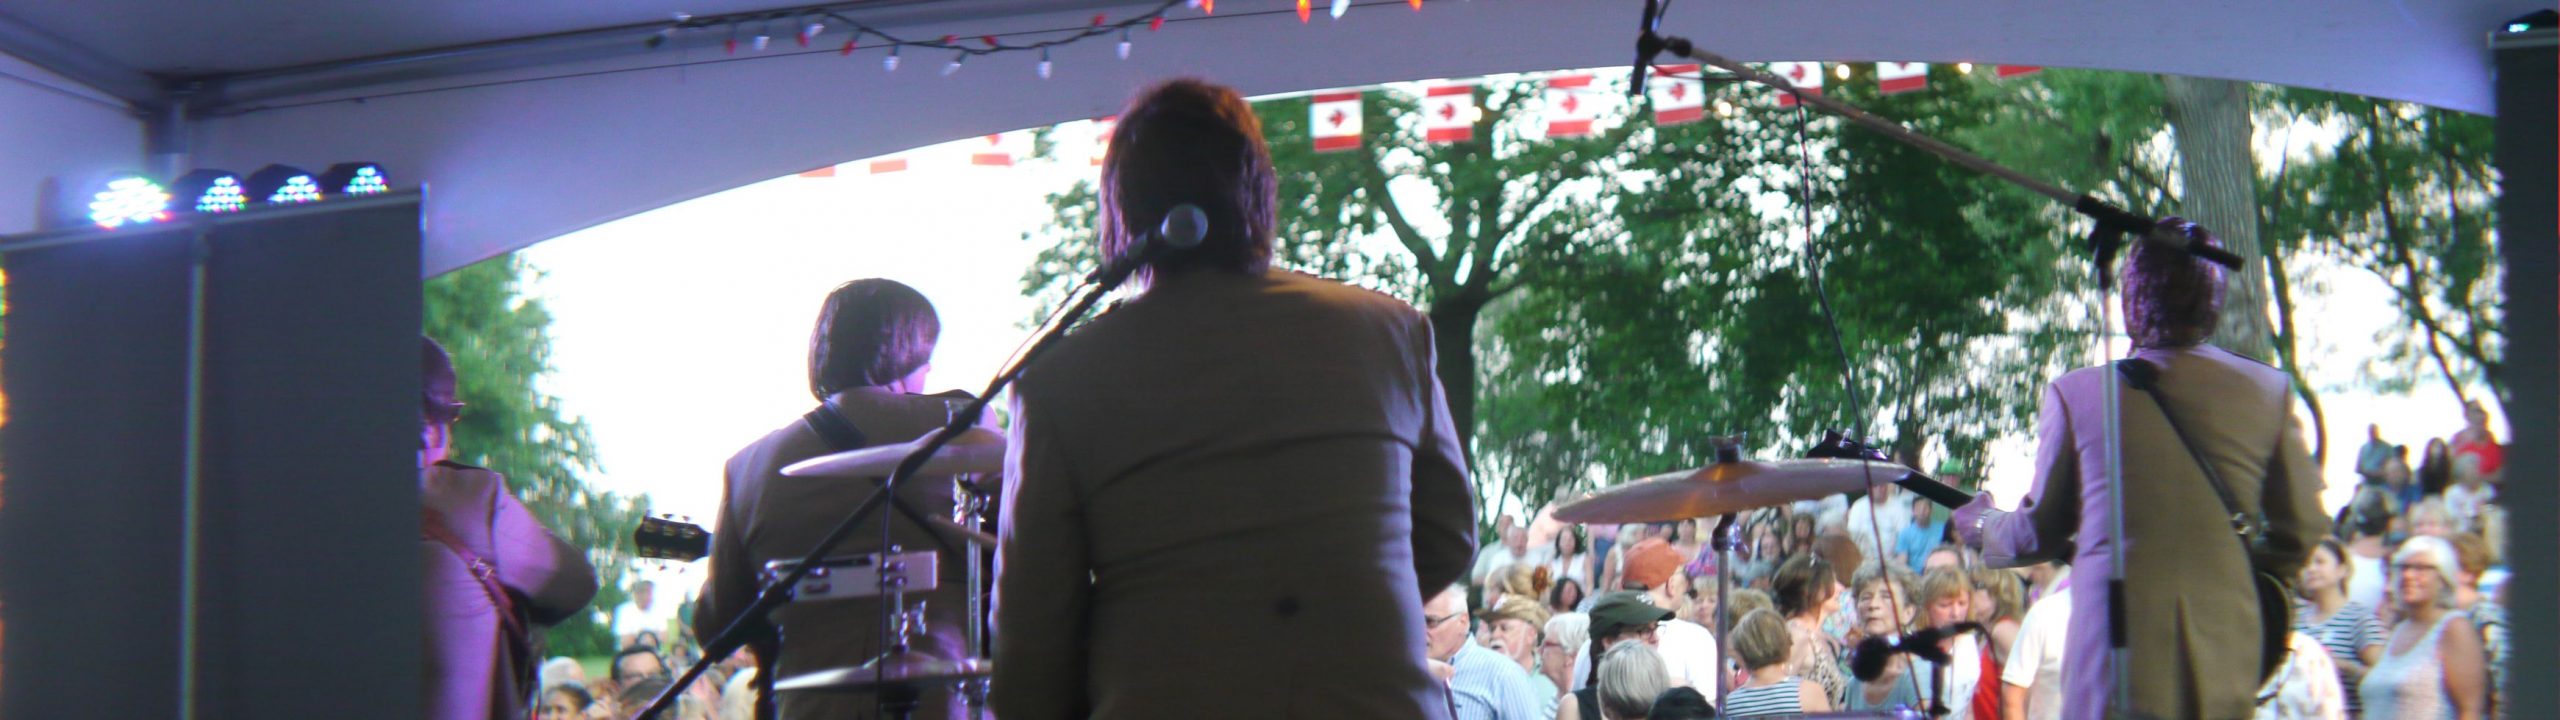
Using these lenses will create the widescreen images that we see in movie theatres.
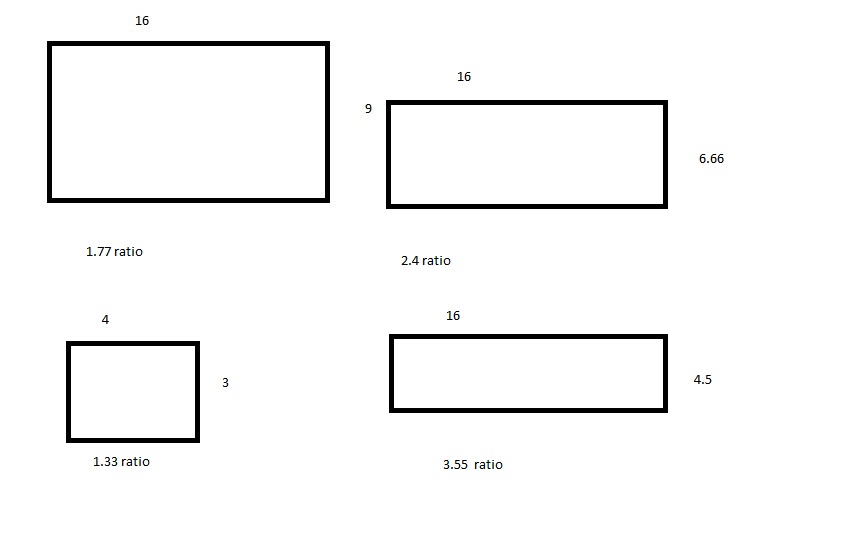
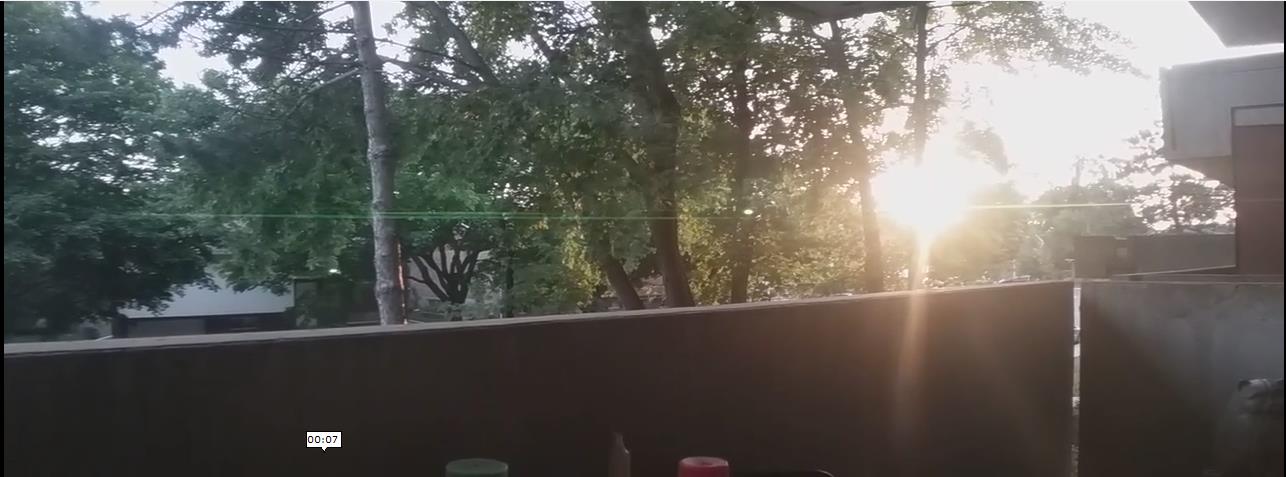
The most common aspect ratio is roughly 2.39 to 1. If the vertical height of the image is 1080 pixels then the horizontal would be 2.39 times that or 2581. Similarly, if your screen is 88 cm * 49.5 cm displaying an anamorphic film of a 2.39 ratio you would give a height of 36.8. Many TV commercials are being shot at a 2.39 ratio. When they are displayed on a regular 16:9 HD TV you will see black bars on the top and the bottom of the screen. If you filled the height you would lose image width. Other features that are highly sought-after are the blue or red flares. If you are a fan of the “Alien” movies, you surely would have seen these flares. Often these flares are faked to an unreal degree using filters and software.

The current HD or 4K TV aspect ratio is 16:9 or 1.78 to 1 ratio. Standard or SD TV was 4:3 or 1.33 to 1 ratio.
Below is a visual example of different ratios.
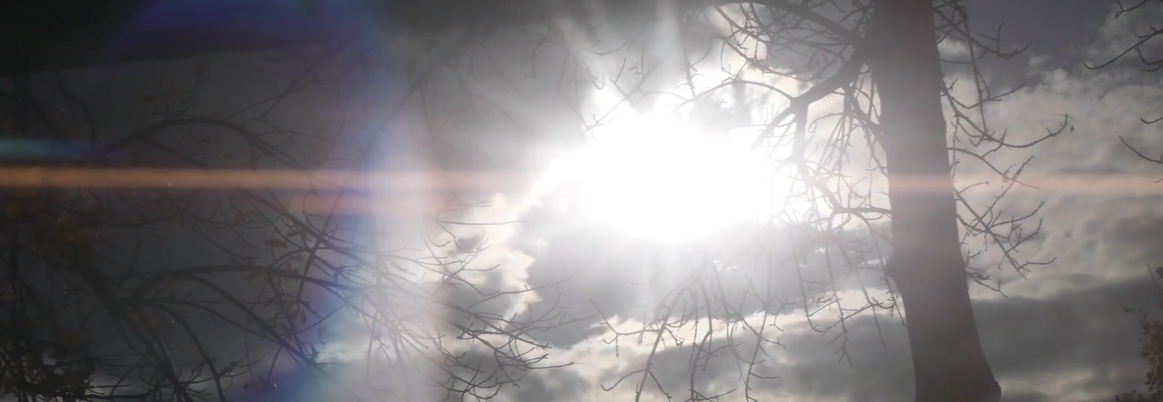
Here is an example of a reddish flare. Depending on lens coatings and light flares are blue, red and sometimes other colours.
When using an anamorphic lens this is what you’ll normally see in the viewer and once the film is downloaded. The camera used here captures in a 16:9 ratio so the horizontal plane is squeezed into that format.

When decompressed or unsqueezed in software the result is below. This is a 3.55 approx. ratio. This is a bit radical and can be easily cropped down in software to a 2:35 standard.
A wee bit of History
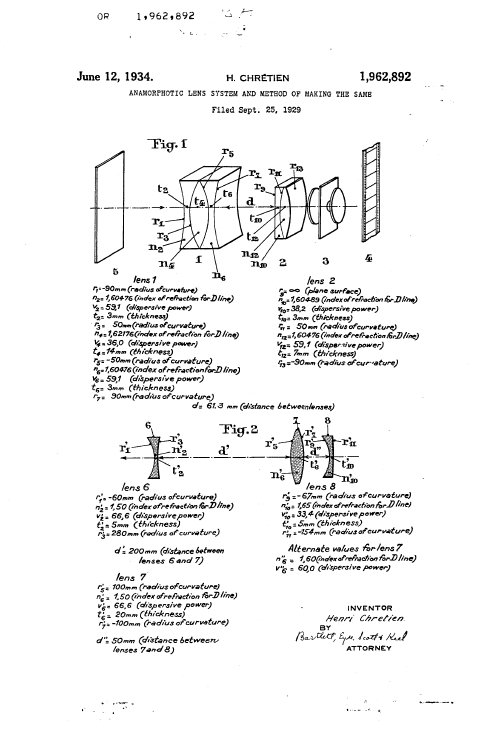
The lens effect was perfected by Frenchman, Henri Chrétien to be used in Combat tanks to give the soldiers inside a wider view.
When TV was introduced to the public in the late 1940s, the movie industry began to lose its audiences. The movie industry thought of ways to make movies a more interesting and exciting experience. One of the first schemes was Cinerama. It was a re-work of previous demonstrated widescreen methods. The first release in 1952 was mostly a travelogue demonstrating the potential of this unique process. The result was three times as wide as a standard film projected on a curved screen that covered 146 degrees of arc, close to that of the human field of vision, including peripheral vision. You would actually feel motion sensations. It wasn’t for the queasy. If for example, the scene was filmed from an airplane, you would feel that sinking feeling in your stomach as the plane pulled up or down. It was dizzying, to say the least. It was an extremely wide image but still in flat 2 dimensions.
Although the idea was good, the technology was not. It required 3 separate cameras in sync to film it and 3 projectors in sync to project it. The results were not exactly seamless. The colours from the 3 different films didn’t always match and you could see the seams on the screen. It required special cinemas to be built or modified as the screen was huge and arced. The sound although was spectacular. It was played back on 7 tracks with speakers placed across the front screens, the sides, and the back of the theatre.
It wasn’t until 1962 that the process was actually used for a feature film, “How the West Was Won”. The effect was spectacular. The process was slightly improved.
The next idea back in the 1950s was 3D. Although the process was demonstrated in the 20’s it came back in 1952. Here again, it was an expensive process and required the audience to wear those blue and red anaglyph glasses. Watching a film through dark glasses resulted in the film appearing very dark. The glasses weren’t exactly comfortable. The process is explained on my 3D page.
Here are two interesting videos on the history of widescreen. The CinemaScope Story and CinemaScope vs Todd-AO
Some might ask why not just film in standard 4:3 and crop? Well, when you crop you are losing part of the captured image. There had to be a better compromise. There was. It was the anamorphic lens. The anamorphic lens compresses a much wider image onto a standard film frame size. You then just have to de-compress using an anamorphic projection lens. You are not losing a part of the image. One could shoot on standard 35mm film stock with a standard camera and project it using a standard projector. All that was required was an anamorphic attachment on both the camera and the projector. The original anamorphic lenses did not replace the camera’s taking lens or the projection lens. Think of one of these attachments as corrective eyeglasses. An aspect ratio of 2.39 to 1 could be achieved without some of the shortcomings of other systems. The first commercial full feature release was “The Robe” in 1954. Other systems came out later using wider film and similar lenses
Twentieth Century Fox flew in Henri Chretien from France with some of his lenses. There were problems. There was noticeable distortion in close-ups, both taking lenses and anamorphic had to be focused separately.
Notice that there is no physical connection between the anamorphic lens and the camera’s taking lenses. Think of it as corrective eyeglasses.
Well, most of the problems were solved and a workaround was developed. A standard was established. Combo lenses incorporating both taking lenses and an anamorphic element were developed. This enabled a single-focus solution.
I’m not a professional filmmaker but I do want my films to have a pro look. Hobbyists and semi-professionals first had 8mm and 16mm film. The 8mm system was limited and costly as was the 16mm. Many years later in the 1980s home videotape came out. We were able to shot, erase, re-shoot, anything. We didn’t have to wait two weeks for processing. It was a great improvement but the quality was horrendous. Then came computer editing. They tried all kinds of tricks, slowing down the frame rate to 24 fps to match the standard film rate. DOF adapters hit the market so that film lenses could be used on video cameras. We would crop our films in software to resemble the movie aspect ratio. After the initial VHS and Beta came 8mm, hi8, DV, HD and now 4K. We were almost there!!!! Any serious filmmaker wants that classic “Film Look”.
The Indie Anamorphic revolution began
When movie theatres started going digital there was a huge glut of anamorphic attachments that were no longer required. Some genius decided to revive an old idea. Why not put an inexpensive projector anamorphic lens attachment in front of a DSLR. A new trend began. Independent filmmakers and amateurs were now able to shoot in widescreen at a reasonable cost. There were thousands of cinemas in the world and many had more than one anamorphic lens. So there are a lot out there. Since I first got involved in anamorphic lenses the prices have skyrocketed. Some of the 16mm lense that sold for around $100 are now posted at over $400. So if you are looking for a deal you have to look hard.
Now there is a bit of an issue with using projector anamorphic attachments. They expand the image at a 2 to 1 ratio. The average DSLR shoots 1920 * 1080 (16:9 or 1.77). So, you now have a result of 3840 to 1080 or 3.55 ratios. (1920 x 2 is 3840) When viewed on a TV of 88cm across you have a height of 24.8 cm. This is extreme. You could easily crop down to a more standard size.
The Panasonic GH4 and GH5 can be set to film 4K at a 4:3 ratio ( the ratio of 35mm film) so using a 2x Anamorphic lens results in a 2.66 ratio. Which is closer to the industry norm.
There are some other popular effects that an anamorphic lens creates. One is the oval bokeh, the other is the blue (or other colours) flare. There are cheap ways to fake this also. Some people modify standard lenses with less than a $10 investment and try to sell this lens for as much as a real anamorphic lens costs. Beware of the fakes.
Now that I am (pardon the pun) focused on anamorphic lenses for the past several years, I can’t believe how many types and makes there are out there. Almost every town had a cinema or two. In the past few years that I have been involved, prices have more than doubled. If you have a good budget this may not be a major issue.
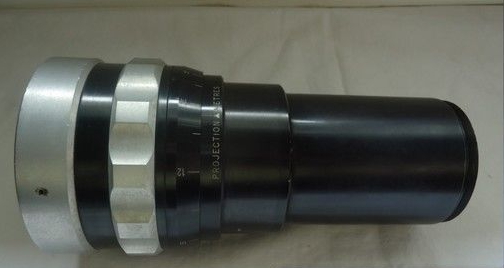
My first anamorphic lens was a huge 35mm Dyaliscope projection lens attachment. Then I bought a B&L 35mm CinemaScope attachment I. Then I procured a 16mm Proskar. Then I bought a mini Chinese phone camera attachment. I also have a Sankor 16 F and a Bell & Howell Filmorama single-focus one. It’s habit-forming.

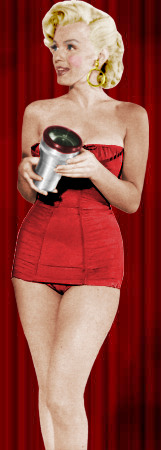
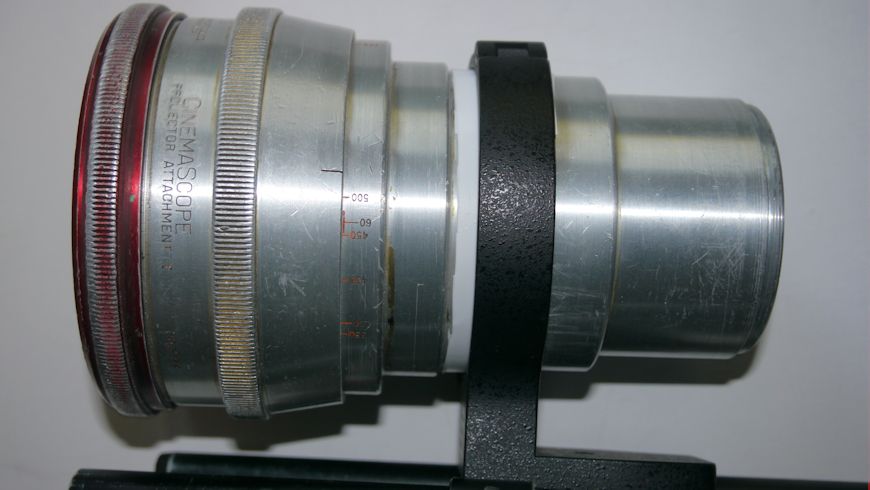
Here is a very famous lady holding the Bausch + Lomb cinema-scope Attachment I
Here is an example of a flare shot with a Mini 1.33x lens on a Samsung Tablet.
These mini Anamorphics can be found for under $40 US. They do work well.
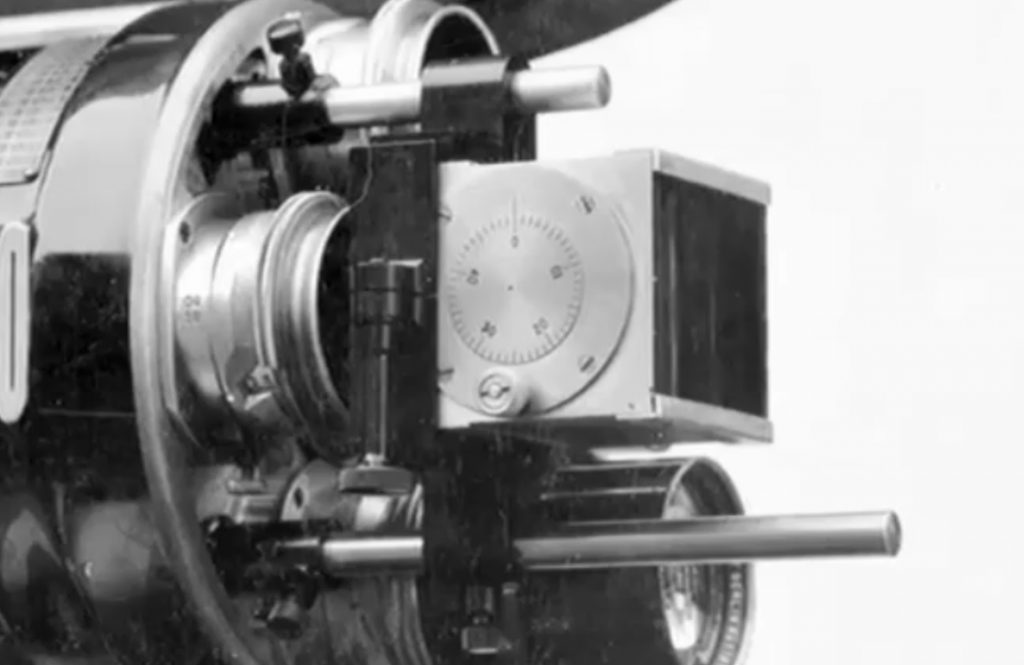
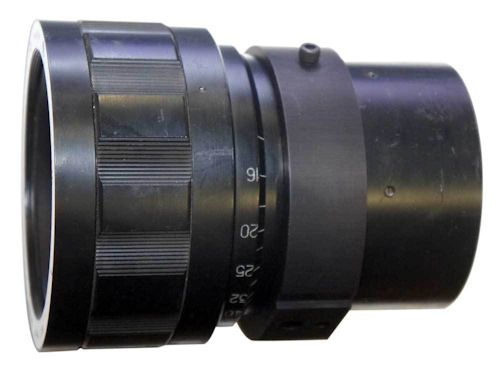
There are two lens sections in these large 35mm theatre lens attachments. They are rotated relative to each other to achieve a clear image. If the front lens is just a hair out of sync with the back lens you will never achieve focus. Some of these old lenses have become unaligned and will not focus clearly.
The clip below is a short video showing how alignment affects focusing.
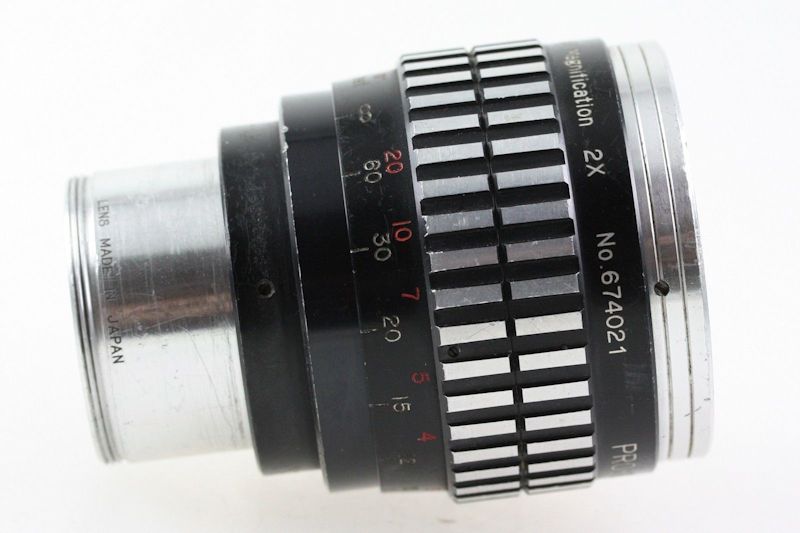
Also, the relative distance between these lenses affects compression. When the two lens sections at the farthest distance from each other they will be at 2x. The closer you get the less compression. When using these lenses in their normal settings you cannot achieve close focus. Diopters are required. Cheap diopters from China will do well.
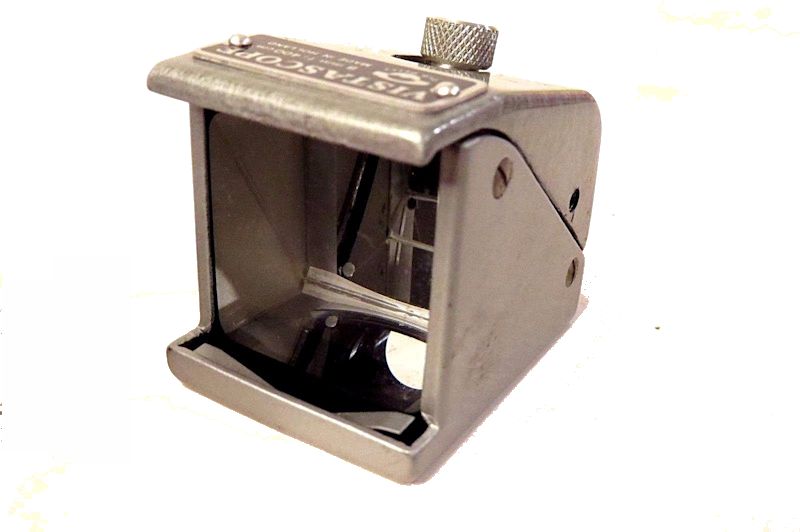
In the 1950s when CinemaScope was taking off several companies decided to cash in the home film industry by offering 16mm and 8mm anamorphic attachments that could be used for both filming and projection. Under the trade names Delft Vistascope and Delrama, an 8mm and a 16mm lens were available. It used a different method to achieve a 1.5 squeeze. The Vistascope and Delrama used prisms. There was the Panavision’s SUPERAMA 16mm. To give you a perspective, it sold for about $170.00 US in 1957. That would cost about $2000 in today’s money. There was the Bolex Anamorphot. Bell and Howell offered lenses such as the Filmorama. These old lenses are best for pairing with DLSRs because of the smaller less heavy size. If you are lucky you may find one in an Estate sale of a rich person.
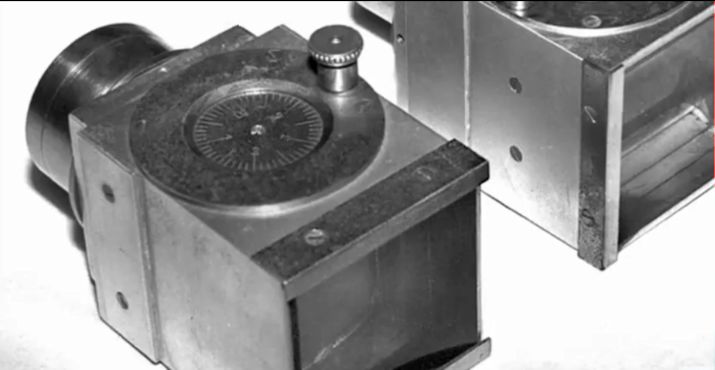
This Vistascope below uses prisms to achieve the squeeze.
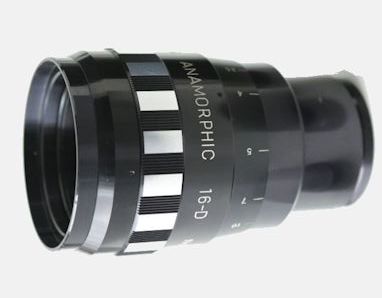
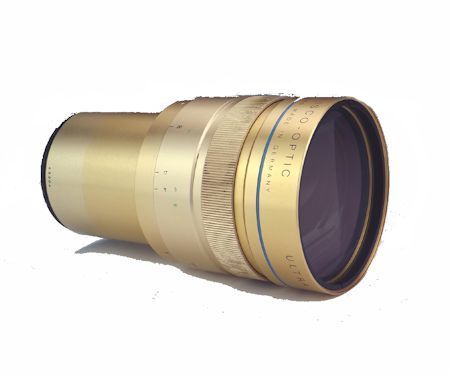
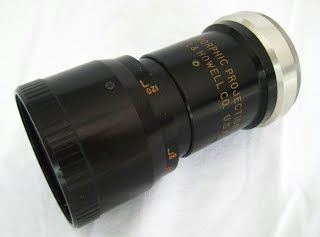
This is another popular lens but because of its coating, the flares are less than desirable. Again this is a heavy 35 mm projector lens attachment.
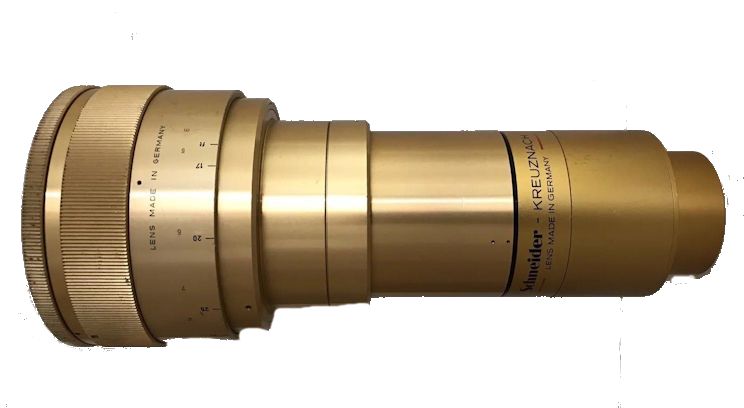
Often these old projection lens attachments come with the actual projector lenses. This is a good thing because the old projector lenses can sometimes be used as cheap Petzval lenses. Which can be used for stunning portraits with amazing bokeh. I have adapted an old Kollmorgen Snaplite to use on my Mirror-less using a cheap helicoid and a bit of electrical tape.
Some users experimented by separating the anamorphic lens elements to achieve closer focus. I tried this. I eventually cut the back lens off by sawing the barrel. The front lens screwed out. This required some heat from a hairdryer to loosen the old grease. Using a rail and lens clamps I assembled the lens so that I could move them closer than previously possible when they were in their housing barrel. Much to my amazement, I was able to achieve close focus. I still haven’t made a permanent housing. I planned to use old bellows. There is a downside to this. The compression changes as you approach the two lenses. So I devised a plan where I must film a circular object at each lens position. I use a plastic container lid. When it comes time to de-squeeze, I have to use the circle as a guide. If the circle is round, then the film is properly decompressed. The way to do this is to film a round object at each different setting.
Other lenses
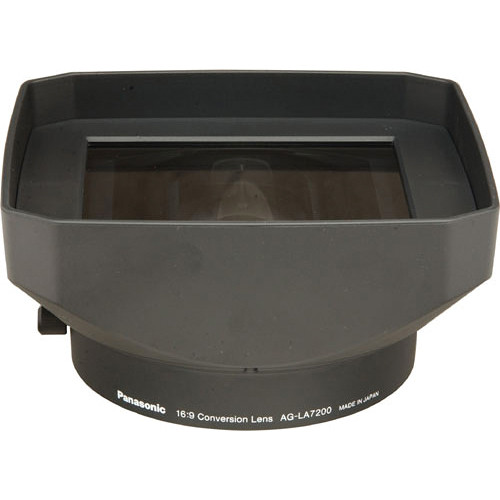
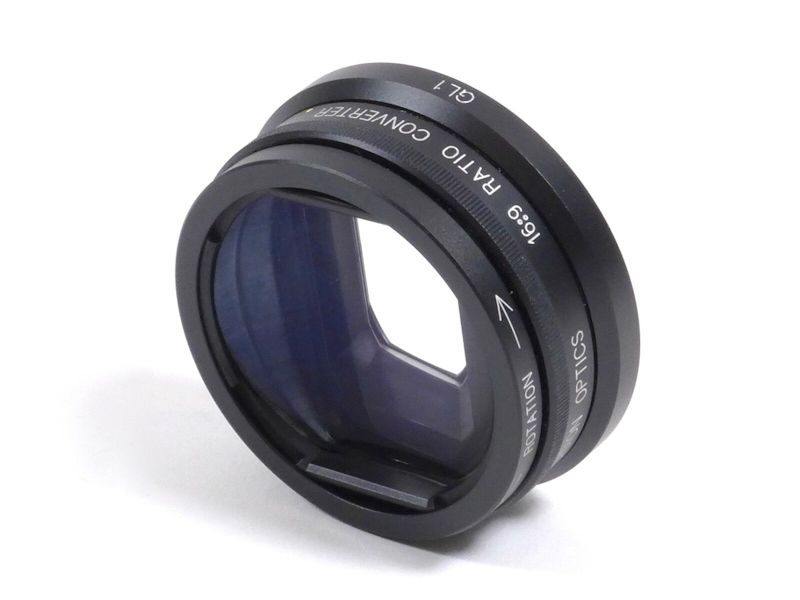
When HD TV was introduced there were some expensive camcorders that still shot in 4:3 ratio as opposed to the HD 16:9 ratio. Both Optex with its OTDV58ANA and Century Optics with its DS-1609-SB appeared on the market to convert the 4:3 to 16:9 by using an anamorphic lens with a squeeze factor of 1.33x. Panasonic did the same with it’s AG-LA7200G. Remember 4:3 is a 1.33 ratio and 16:9 is a 1.77 ratio. Multiple 1.33 x 1.33 and you get 1.77.
If you apply these adapters to a native 16:9 camera, 1.77 x 1.33 you get 2.35 which is the standard for CinemaScope. So people are using these old adapters on their DSLR to achieve anamorphic results. The downside is that they are very rare and because of that expensive.
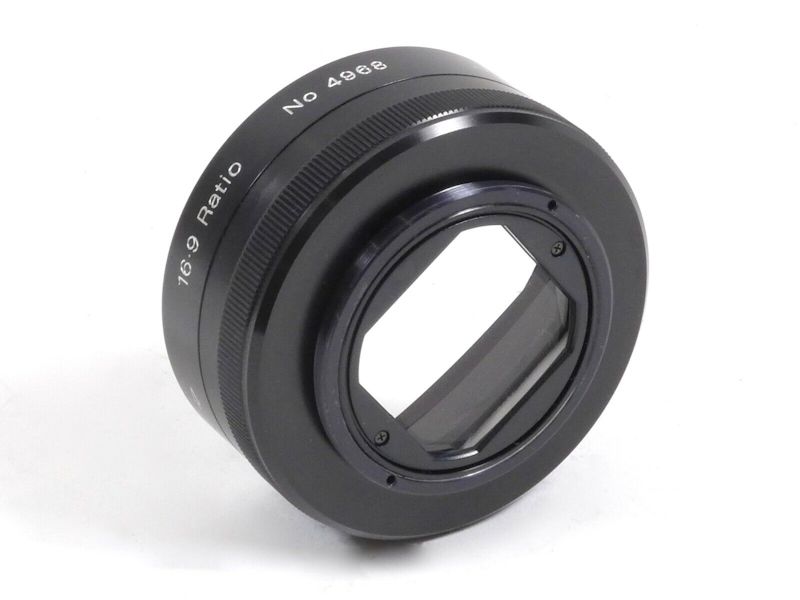
Single Focus Solutions
Focusing with these old anamorphic lenses poses problems as both lenses have to be focused separately. To overcome this issue, there are a few companies that offer a single focus method. They don’t come cheap. They use variable diopters. Variable diopters are composted of two diopters one positive and the other negative. As they approach each other they cancel out their magnification. So if you can film a close-up clearly with a +4 diopter you will need a -4 to cancel its effect and bring you back to infinity.
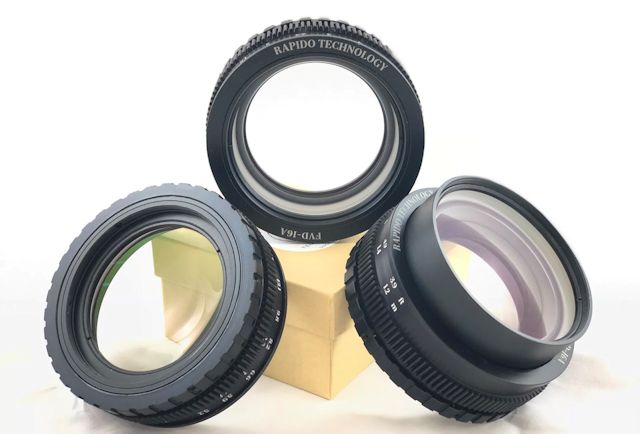
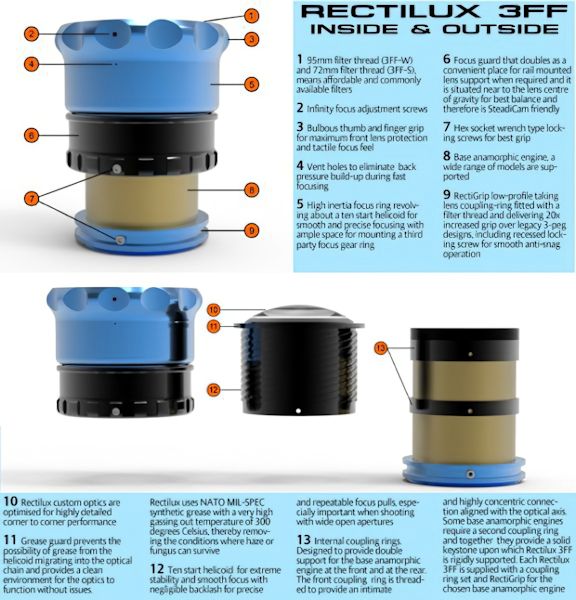
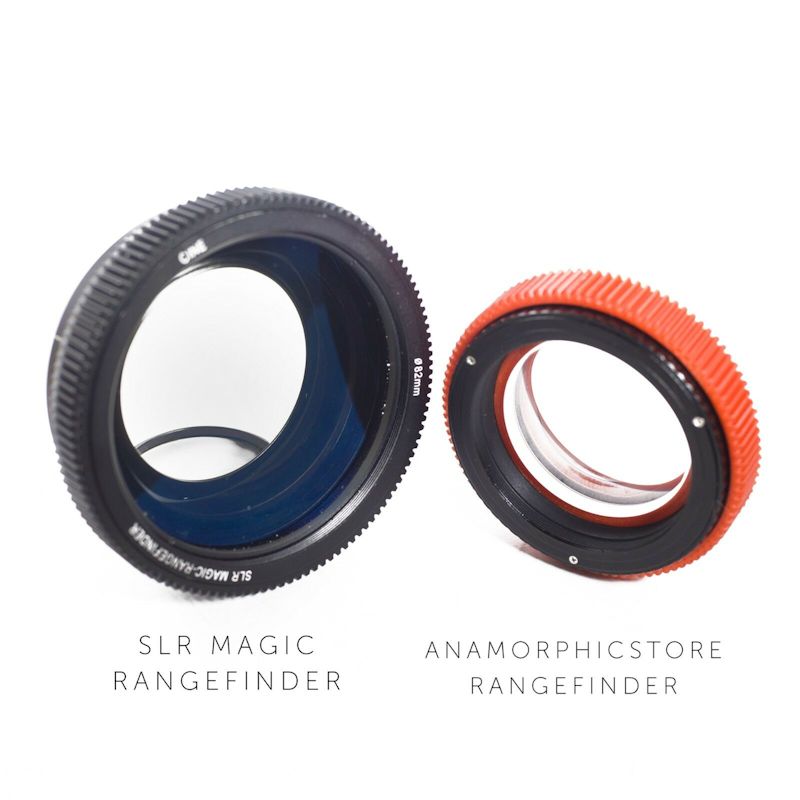
Models that come to mind are “Rangefinder” “Rectilux” and “Rapido Technology” With these adapters you must first focus the taking lens and the anamorphic attachment to infinity and you then focus by using these adapters. It is best to use your eyes when focusing as I have found that just placing the lens marker on infinity did not result in a clear image.
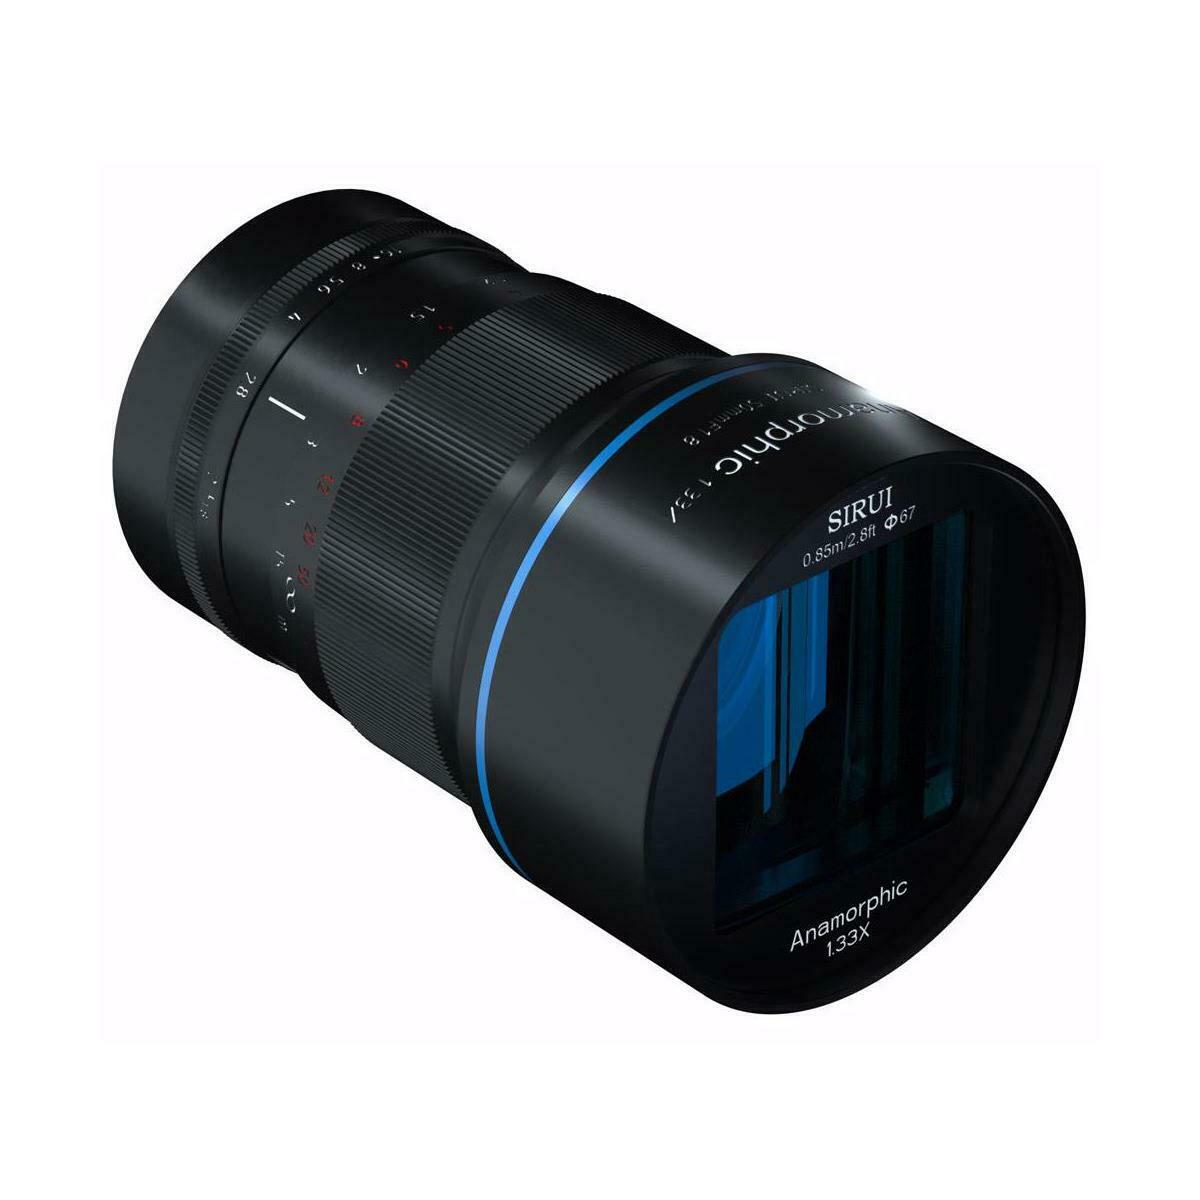
If you have the money there is the Sirui 50mm F1.8 Anamorphic 1.33X Lens. It list at $699 US. It is a single-focus lens and has had good reviews. Being a 1.33x you will be able to achieve close to a 2.40 ratio.
You might find some older variable diopter lens attachments on the market but there are not useful with these anamorphic lenses. Some people have experimented with DIY single focus.
How does “single focus” work?
The trick is variable diopters. So how do you vary the strength of diopters? It is very simple. Let us say that without a diopter you can focus to infinity but you cannot focus less than 6 feet. . You add a +2 diopter, you can no longer achieve infinity but you can focus closer. So need to cancel that +2 gradually. How? The trick is using a negative diopter i.e. a -2. These diopters are set apart and are brought close together thus achieving variable focus. Apparently, wide-angle adapters the kind designed for older camcorders have the lens elements that can be used for DIY single-focus adapters. In this video, we are shown how to make a DIY single-focus adapter.
Here is a tutorial on making your own DIY single-focus adapter using a Century Precision Optics Pro DV .7X Wide Angle Converter.
Here is another take on a similar idea.
Source: the Pfocus | the 3D printable DIY single focus solution by LucMeister – Thingiverse
The Fujinon WCV-82SC Wide Conversion Lens used in the above DIY article is a 0.8x wide conversion lens. 82mm diameter
Here is another article on DIY single focus.
Source: Single Focus Instructions for Anamorphic Projector Lenses – ANAMORPHIC – EOSHD Forum
Here’s another idea that I will try one day : Building a Super Cheap single focus unit. posted by Tito Ferradans
I have the files for the 3D printouts.
The huge 35mm theatrical lenses are still the cheapest and some are very clear. Most users want to use the smaller 16mm lenses. Back in the mid 50’s people (with lots of money) could buy 16mm or 8mm attachments to shoot and project widescreen at home. Lots of these lenses show up in Estate sales.
Most of these lenses do not have the same mounting diameters as standard lenses. There are companies out there who offer clamps that clamp onto the taking lens and then have a threaded ring that mounts to your Camera lens. Even if the anamorphic attachments did have standard mounts (some do) it is not advisable to use them. The anamorphic attachments have to be adjusted so that the image is not skewed. I use the right angles of bookshelves etc. to set up. I have made adapters using lens adapter rings glued onto standard PVC plumbing parts.

The one above was made to hold a 16mm Proskar Sankor etc. with a 34mm thread. I used it on my Canon camcorder. I used an IPEX 327282 2” ABS coupling used in plumbing. It is 2” diameter which fits easily over the back end of the anamorphic lens after you file down the back opening a bit. Then I glued a 52mm to 58 mm step-up ring using JB WELD Water Weld. Be careful as I have not done any torture tests. Using a tool and die set I created holes that matched the ¼” bolt that I had on hand. You could use shorter bolts with wider heads to make it easier to tighten. You simply fit the ABS part on the lens and slowly tighten the bolts evenly. You must not tighten them too tightly as you have to rotate your anamorphic lens to keep the image from being skewed. You then screw the anamorphic lens onto the end of your taking lens. I used a Russian Helios 44-2 which has a 49mm thread. Then you can adjust the skew and tighten the bolts.
The next problem is that most if not all of these lenses do not have threads on the front side, so if you want to add filters, diopter or single focus solutions you’ll need some sort of adapter for the front. The same companies that make rear adapters make front ones. Now it may not be hard to DIY. The Proskar for example is 2.36” (60mm) diameters in the front. There is again a plumbing coupler that fits nicely. You could cut the ABS part and use the above method to secure it. You could glue an appropriate step-up/down ring to it and voilà Bob’s your uncle.
There are so many different makes of lenses, it is hard to keep track. The big 35mm attachments were everywhere in the world. One of the first ones was the Bosch & Lomb CinemaScope attachment I. Bosch & Lomb also licensed out their techniques to several companies. This is why you find a slew of similar lenses with slightly different looks and names.
As I said previously there are some DIY’ers that have created somewhat usable single-focus units. They use a couple of diopters (give or take) with a movable wide angle adapter, the kind that was developed for use on a camcorder. An example is the Cavision 0.6 wide-angle adapter. I tried this method but was not getting good results.
There is the “Bell & Howell’s Filmorama” 16mm anamorphic attachment. It was made both to film and to project. It was a single-focus model. The main complaint is that one has to turn the lens many times to focus. I was able to find one but it was missing its front lens. After doing some research I was told that this was a negative diopter. That same fellow gave me a spare that he had.
Here is a Filmorama promo front 1955.
Courtesy of the Chucky Lou Memorial Film Society.
Here are a couple more articles from 1955.
Source: Wide Screen Home Movies, circa 1955 Popular Science February, 1955
How to un-squeeze
I use Handbrake for quick conversions it’s free and easy to use.
These are my usual settings for using a 2x lens with 1920*1080 formats. I set the width as 1920 but cut the height to ½ to achieve the correct ratio. This results in a 3:55 to 1 ratio It can easily be cropped.
For a wealth of Anamorphic info visit Tito Ferradans ‘s excellent site.
Here are lots of information regarding filming with anamorphic lenses. The guide covers from the origins of anamorphic all the way to post-production.
Source: Anamorphic on a Budget – Revised and Expanded
If you want to achieve the anamorphic look without the expense check this article out.
Maybe you don’t need an anamorphic lens to achieve the look.
Source: Tutorial: How to Get the Anamorphic Look Without the Anamorphic Lens
Another method for faking flares in software.
As in most of my projects, this is active and growing. So come back soon.