
Home Studio Recording
In the beginning, an audio recording was limited to expensive studios using expensive equipment. That all changed with the advent of home computers. Home studio recording is now a respected tool. We look at the history and where it is today. What do you need and where can you get it. You can make an excellent recording at home all you need is the ears and the talent.
Let’s begin with the history of the home studio and where it stands today.
Way back when, if you wanted to record two or more instruments or vocal parts, you had to have two or more players. Les Paul, the guitar player, changed that forever. Unfortunately, it wasn’t available for everyone as the machines were expensive and custom-built. In the late ’50s and early sixties, home stereo reel to reel tape recorders hit the market. Many had a feature named “sound on sound”. Musicians immediately saw the potential. You could tape bass, drums and rhythm guitar on one track, you then listened to the recording and added vocals & lead parts on the second track. If the machine had a separate record & playback head, the tracks were out of sync so you had to mix the prerecorded material with the new live material. This was very tricky and results were hit and miss. You could keep bouncing and build up many tracks but the noise build-up would be terrible.
Teac changed all this around 1975 with the release of the A3340 and it accompanying mixer model 2.

This revolutionized home recording. You had 4 separate synchronized tracks on inexpensive ¼ “reel to reel” tape. Using the 15 IPS ( inches per second) tape speed, the quality was quite good with minimum tape noise. Soon afterwards 8 track and later 16 track semi-pro recorders appeared on the market. Next came all-in-one mixer-recorder units with 4 to 8 tracks on cassette and 12 tracks on VHS and so on.
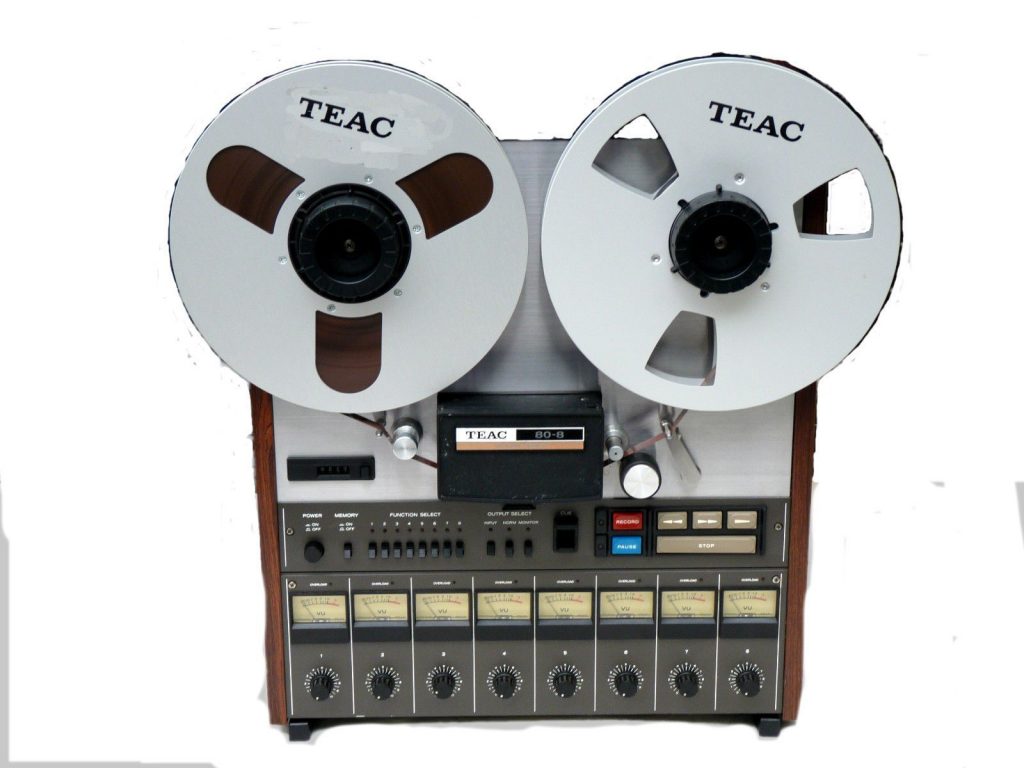
Before long they released the 80-8, 8 tracks on 1/2 ” tape. They released the Model 3 and Model 5 mixers.
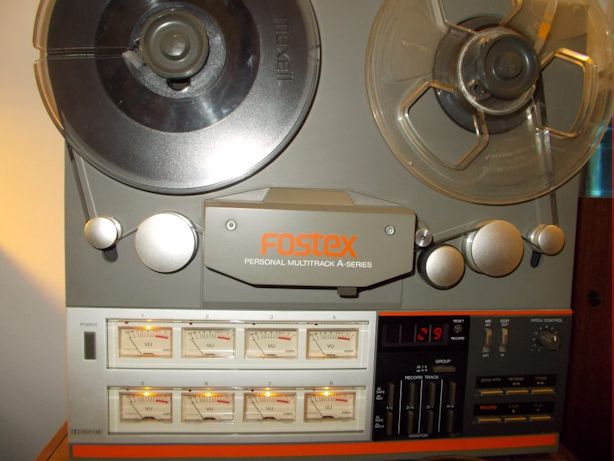
The Fostex A8 introduced 8 tracks on 1/4 tape but only 4 tracks could be recorded at one time. It was soon replaced by a model that could record all 8 tracks simultaneously.
Now before you go poo-poo using tape, look at the advantages. Let’s look at either a tape deck with a mixer or an integrated mixer recorder. You just have to turn everything on, load the tape and we are ready to go. Assuming we have simu-sync, there is NO latency. The machine will not crash or freeze. You get an idea, can start recording in seconds, no no need wait for a machine to boot. You see exactly how much tape you have left, there are no overhead files. You can see the physical signal path.
Usually, you have the volume to spare. I always find that when recording with a computer the volume levels are never high enough or at least way lower than I was used to. When you are finished you can store the tape. You don’t have to burn a disk.
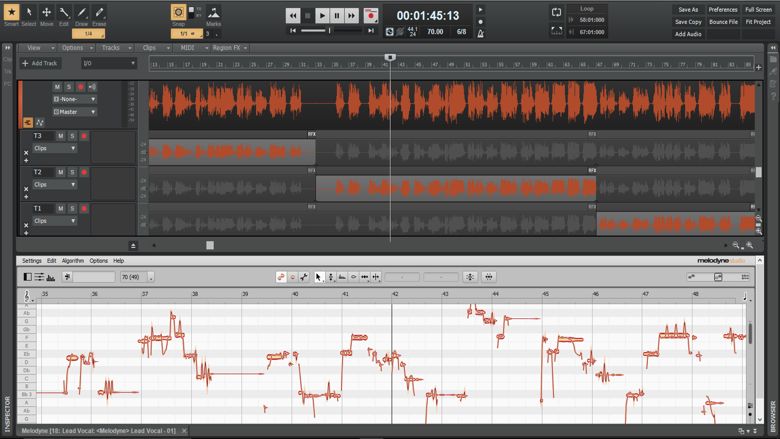
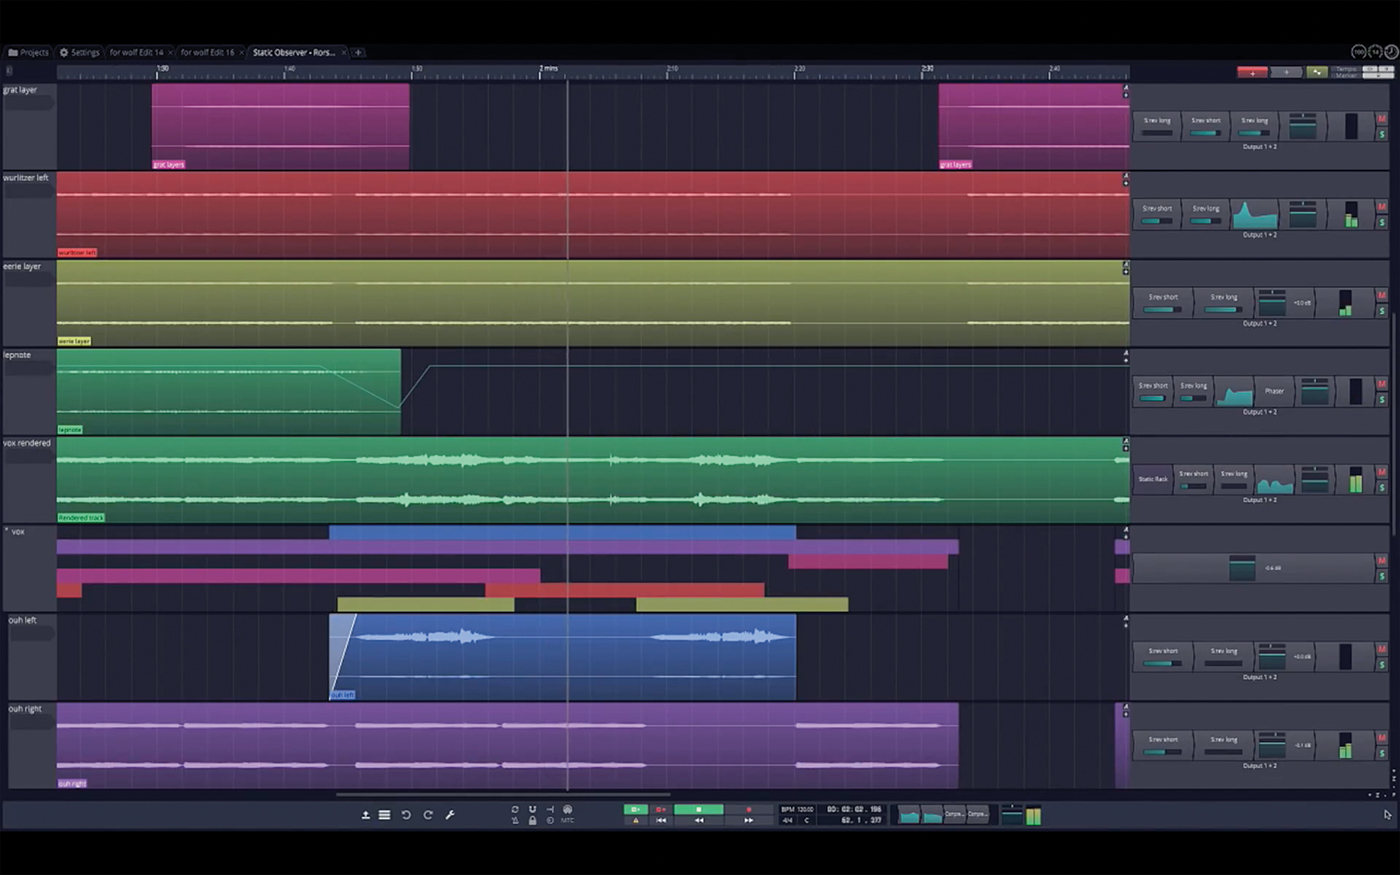
With the introduction of personal computers, home recording has moved into the digital age. I always believed this was to be the ultimate recording solution. Digital allows you to add tons of tracks and edit like a word processor. There is no loss when overdubbing if you have to overdub. Unlike using hardware, there are many free applications that allow you to do amazing work. You can correct audio errors without having to redo the whole track. You can unflatten flat vocals.
If you are into Linux, Ubuntu has a full-function DAW (digital audio workstation) that can compete with the likes of Protools, Cakewalk and Cubase. Ubuntu Studio
Computer-based studios DAWs
Most of us have a computer or can obtain one for a reasonable price. Those old analog machines cost a fortune. The Teac a3340 and model 5 mixer cost over $2000.00 back in 1976. That would be almost $10,000 in today’s money. You could set up a monster studio for that price. You can also assemble an impressive setup for less.
All modern computers are powerful enough to do some serious recordings. You need at least a core 2 processor with at least 4 GB of ram. BTW used core 2 computers can be had for under $100 US. Obviously, an i5 or i7 with 16 GB of ram won’t hurt.
A 500 GB hard drive is fine.
a CD DVD or Blu-Ray burner to back up your recordings.
You’ll of course need audio recording software. You don’t have to spend a fortune. There are several completely free packages out there.
Remember to defrag your data hard drive often. I use Smart defrag from IObit. This will make a difference. If you can afford an SSD drive, go for it. A sluggish computer will fly with an SSD drive.
Free DAW software
Zentracker You don’t have a laptop or a computer? No problem. Try this APP from Roland called Zentracker. There is both an Android and IOS Apple version. It’s free. So you can record multi-track on your phone or tablet.
Cakewalk which has been around since the beginning is now FREE. This package is the overall best free DAW available.
Ardour DAW on Linux
Studio One Prime it doesn’t look like there is a free version currently. This company is more into software rentals.
Pro Tools intro This seems to be the replacement for Pro Tools first.
Audacity I can’t say enough about Audacity. It’s a great free package with features only found in the best-paid software.
It’s quick and easy to use.
Ubuntu Studio Originally this was an audio package. Now it’s a full-ranged multimedia media package. It’s free and can easily try without have to change your OS. There is also the Ubuntu OS which has saved my life many a time. You can test drive both these free packages by running them from a DVD. You might become a convert. These are Linux open source-based software.
Here is some more info on free DAW’s from Musictech
Whatever type of music you are making, your hobby need not cost you a fortune. In fact you can make complete pieces of music with free software. Here’s how
Source: A Guide to Making Music for Free: The Best Free Software and More
Not so Free Pro software
Cubase has been around since the beginning. It was only available on Mac but they did see the light and released it for Windows.
Pro tools Like the name implies this package is probably used by the vast majority of Pro studios. So working with this package will prepare you for a pro career if that’s your path. The sad part is that you have to rent this monthly or annually.
Cakewalk error fix
“Unable to open audio record device “ click on this link for a solution that worked for me. This occurred when I tried to playback an older recorded project.
Apple Garage Band I’m not an Apple fan. I like to have control of my machines and not be forced into paying more and more for everything. I do realize that some of you are technically challenged so Apple is probably best for you.
Audio Interfaces
Now how do I get my guitar and vocals into my computer? You’ll need an Audio Interface. You could plug it into your sound card but that is very limited. The current way to go is via USB. There was a time when Firewire was popular but USB has been improved.
The cost of Audio interfaces all depends on your needs. If you are planning to record just by yourself then an interface with 2 inputs will suffice. Remember it is best to play along with a click track or drum loop. This way you can easily over-dub additional instruments, vocals etc.
If you are doing live recording two inputs may be OK as long as you can premix everything using an external mixer.
If you have an eight-input interface you are still limited. Let’s say you have drums, guitar, bass, keyboards and vocals you would be limited. Many engineers use 4-8 microphones for the drums. Let’s say you use only 4 for the drums, 3 for Guitars and bass and 3 for vocals. This is the setup we use often to record. That’s 10 inputs. You might have to record a basic track and add the rest later. You can find up to 16 I/O for under $300 US. If you are recording at home 2 will usually do the trick.
There are some great older interfaces found for sale at reasonable prices but these may require older PCI slots. Look before you leap.
Use the Internet to source out your needs, do not go to your local store before you know what is available out there. Stores do not work in your best interest. Only you can work for your best interest. Remember many products on Amazon and eBay can be found at better prices elsewhere. Do your research. Take your time.
Here are some of the current models
Tascam US-2×2 and US-4×4
Roland Duo Capture EX ( discontinued)
Microphones
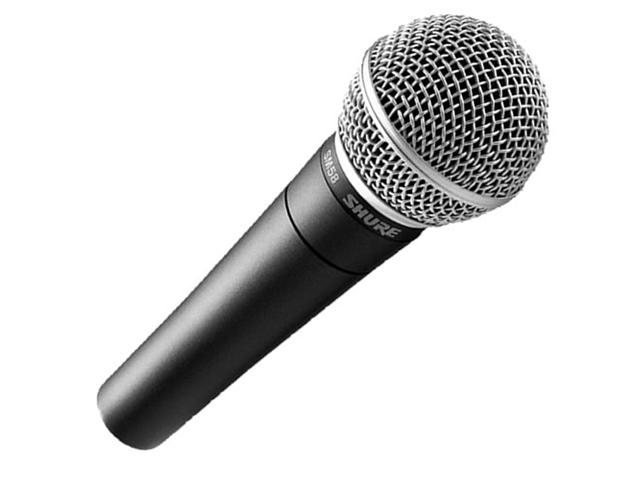
You could use something like a Shure SM58 or SM57. You may already have one of these.
Years ago I have the pleasure of recording with this great mic. The RCA 44.
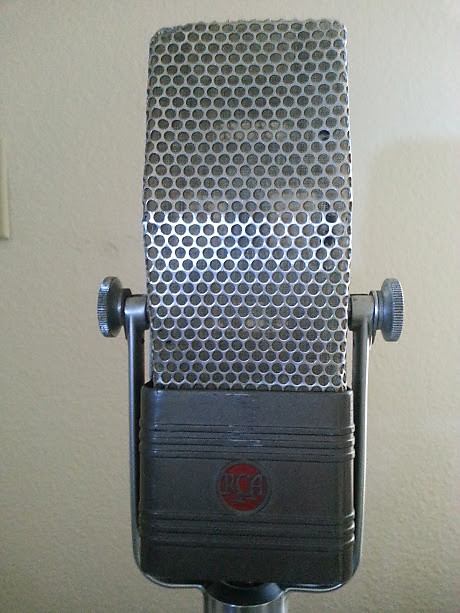
This is a classic from the 40’s I believe. It’s a ribbon mic. A foil strip vibrates when you sing or talk into it and the motion is converted into voltage. The SM57/58 are dynamic mics. They are very much like a speaker and yes you can use a speaker as a mic for you won’t get much bandwidth. It has a membrane with a coil that moves within a magnet. These are tougher and can handle more sound pressure than a ribbon. The other type of mic is the condenser. It works like a capacitor. Its membrane moves relative to a fixed plate. This varies the capacitance which in turn varies the voltage. The current is very low so these types of mics need to be powered. Often they will require a battery. Phantom power is the voltage supplied via an external power supply, usually 48Vdc, using the microphone’s own cable. When purchasing an interface it is best to buy one that has phantom power. PLEASE BE careful to turn the phantom power off when using a mic that does not require phantom power.
The AEA R44c is a recreation of the famous RCA 44.
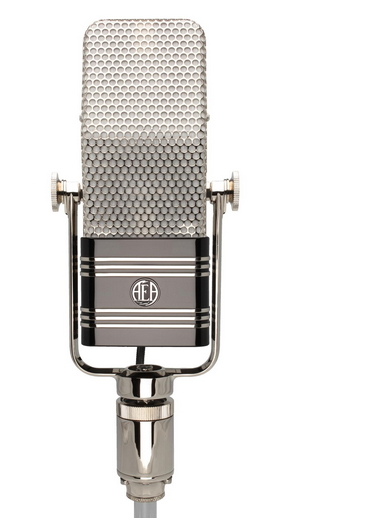
Both Condenser and Ribbon mics are best for vocals and acoustic instruments. Both of these types were extremely expensive. Times have changed. The Chinese make some very decent and inexpensive mics. Sure they are not as good as Neumann U87 but if you don’t happen to have a spare $3600 US you might want to look into the Chinese offerings.
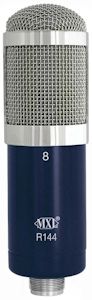
MXL R144 I think this was the least expensive ribbon mic ever. There are many others. If you are into modding your stuff there are a few websites that explain how to mod these into much better units at a fraction of the cost.
Samson C01 This again was also one of the early inexpensive condensers. They sound very good. There are many people out there, the Nay-Sayers, that cannot believe that you can put out a good product for such low prices. Don’t waste your time listening to them.
Sound treatment
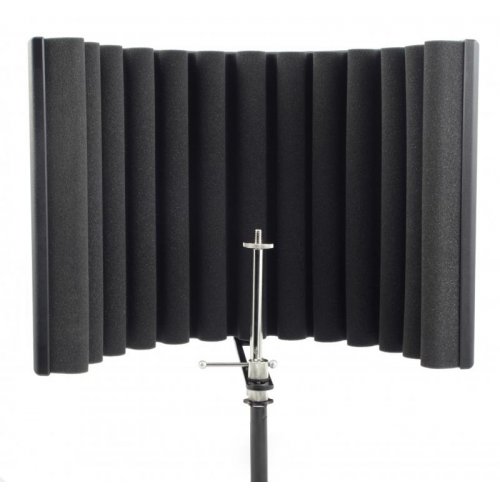
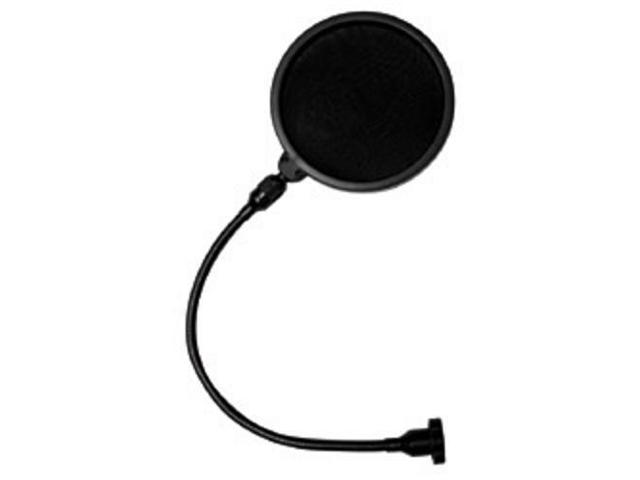
Professional studios are sound-treated and soundproof. There are ways to accomplish this at home. One of the least expensive items to buy or make is a pop filter. This will help eliminate Sibilance and breath pops. Vocal booths would be a great idea. Check out the market on my Vocal Booth page. You may get away with just a reflex filter.
Near-field Near Monitors
You can get away using headphones. Even a good set of computer speakers will be a good start. Ideally, you may want to use what the pros use, near-field monitors. Also, it’s best to listen to a mix at a low volume.
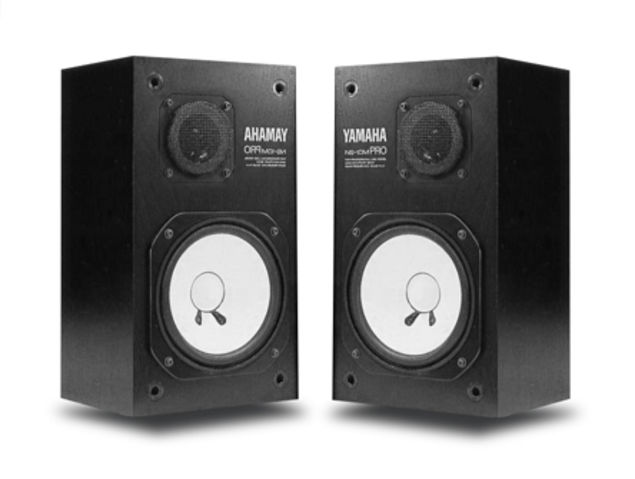
One of the classic models was the Yamaha NS10. Many great sound engineers swear by them. Since it is now a well-known fact prices have sky-rocketed.
Here are some of the current models
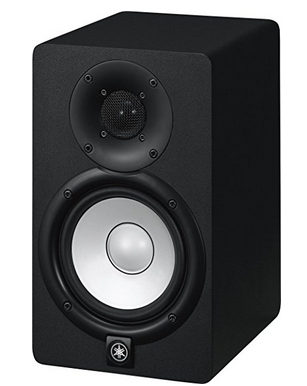
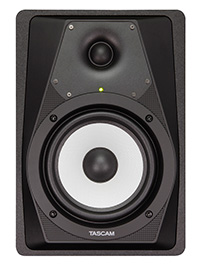
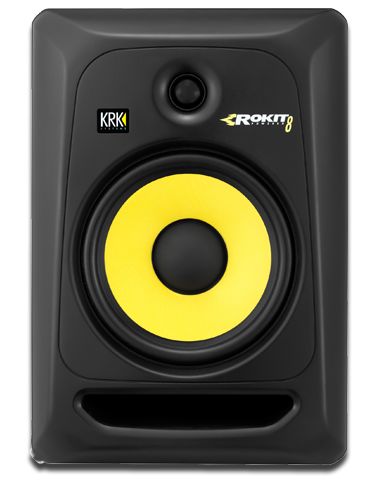
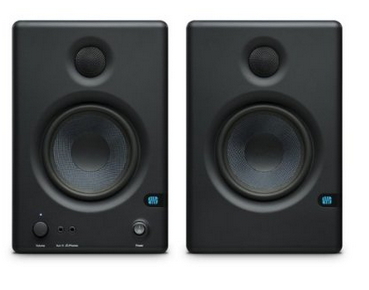
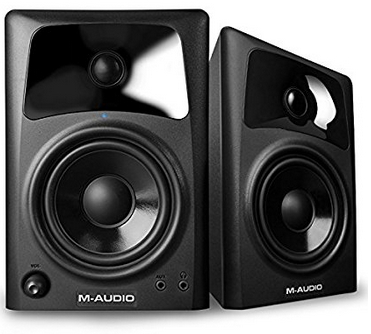
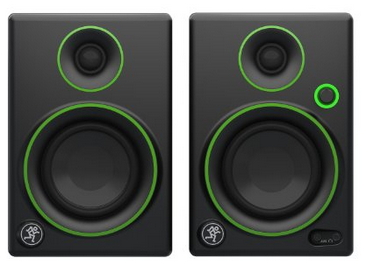
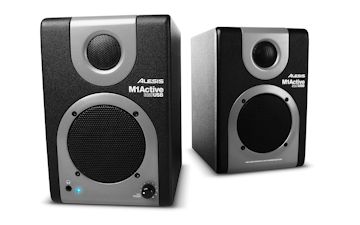
The idea behind near-field monitors is that you are near them, 2-3 ft or so. They ideally do not colour the sound and you hear the sound that is direct and not bounced back by walls etc. Using these types requires an amplifier of some sort. Fear, not most models include built-in amplifiers.
Here are some more great tips. This comes from CD-Baby.

5 Tips to Improve Your Home Recordings Right Away – DIY Musician Blog
De-Mystifying MIDI
If you want to find out more about MIDI, look for older magazines that were written when MIDI was new to everyone. Old Keyboard and old Electronic Musicians are pretty good sources. Then again every few years some recording magazines will explain the fundamentals of MIDI again.
M.I.D.I. (Musical Instrument Digital Interface), is an electronic protocol or language created by synthesizer manufacturers so that synthesizers, drum machines, sequencers, tape machines, and computers can communicate with and control each other. General MIDI was later introduced so that a sax sound on one brand of synth would sound like a sax on any other company’s synth.
MIDI files are small because they are not recordings of sounds. They are sequences of control codes that tell i.e. the synth what notes to play, how long to hold it, how loud, what voice to use ( piano, bass, violin) etc. If you even saw an antique player piano this is a great analogy. It’s actually the piano that plays. The piano rolls are just rolls of paper with holes in them that drive a mechanism that strikes the piano strings. The old Telex machines also worked this way. MIDI works in a very similar fashion.
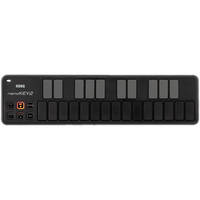
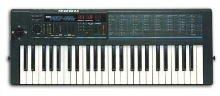
MIDI uses a master/slave configuration. The master could be a sequencer or computer playing the MIDI file. The slaves are the synths, sound modules, other computers, synthesizers without keyboards and drum machines. You could have more than one master but you’ll need a MIDI merger to merge the two controllers. There are 16 channels or addresses. In the beginning, synths could play only one instrument sound (voice) at a time. Players would string together many synths, each set to respond to a specific channel. All modern synths are now multi-timbrel which means they can play multiple voices at a time. A modern synth is also polyphonic which allows them to play more than one note at a time. If it is not polyphonic it’s ” monophonic” and you could not play chords on them. My old Korg Poly 800 II was polyphonic but not multi-timbral so it could play only one instrument sound at a time. Today all you need is a computer with a DAW ( digital audio workstation) program to get involved with MIDI. You might still need a synth to input notes. I bought a Korg nano keyboard which has 25 velocity-sensitive keys. Velocity-sensitive means that the harder you hit, the louder the note will sound and be recorded. It runs straight on USB. No AC adapter is required. Then are also MIDI pads etc. that can be used to input control notes. For more info click here Korg NanoKey
System exclusive messages
System exclusive messages are special commands that pertain to a specific brand of equipment. Each manufacturer has an exclusive ID number assigned to them by a MIDI group. Think of it as its own telephone number. An example of this is the ability to do a data dump to a specific MIDI device where you have more than one MIDI device connected.
Where do I start?
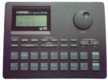
Try to find some used MIDI equipment because I believe that you best learn “hands-on”. Don’t be frightened by all the specs and other techno-warble-garble B. S. You do not have to know everything about MIDI to use it, but eventually, it helps to learn more of the technical side. The first MIDI device that I bought was an old Korg POLY 800 II synth. I had an old non-MIDI Korg DDM-110 drum machine. Shortly thereafter I bought an old Korg KMS30, multisync unit. I then started experimenting with tape sync. Later I read about this sequencer, sound module, and mini keyboard device about the size of a VHS cassette. It was the Yamaha, QY10 (it was the canned demo that sold me). The QY10 also had drum and instrument patterns that can be programmed. At the time all I had was just a 4 track reel to reel recorder. The sync code used one track. This left 3 analog tracks. The sync track could later (as the master) drive a stereo drum machine, a stereo sequencer and other stereo synths/sound modules. From 1 control sync track, you could drive 6, 8,10 etc. virtual tracks. You could start by writing a sequence on your sequencer (or Computer). I did it the other way. Don’t be afraid to borrow someone’s MIDI drum track and modify it. It will save a lot of time.
At first, I used FSK (Frequency shift keying) syncing then I tried “Smart FSK” syncing with an Anatek Pocket Sync. With regular FSK you have to sync from the beginning of the tape so that if you screw up you have to rewind and start again. With Smart FSK you can start the tape deck anywhere and your sequenced parts i.e. on a computer jump to the spot on the tape. My tape deck’s heads were a bit worn on the edges so I had a lot of drop-outs. Then I bought a Music Quest / 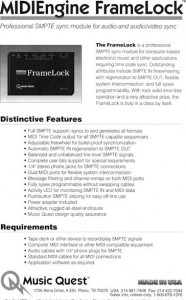 Opcode Frame Lock.
It’s an SMPTE encoder/coder and things have never been better. It appears to be drop-out resistant.
First of all I “stripped” a track on my 4-track. This is when you record a sync track onto an outside track of a multi-track recorder. If you are using FSK or smart FSK, the tape is stripped with a drum machine, computer or sequencer as the MIDI master device. The tempo that you set is the tempo that you will have to live with so plan ahead. If you use SMPTE, you just stripe the tape with time code so the tempo can be changed without having to re-stripe. You could even have a varying tempo. Now using the sync track as the MIDI master I played guitar and sang onto my 4-track using 3 tracks. Now using a computer with a MIDI sequencer ( or a hardware sequencer) software ( Cubase or Cakewalk etc.) you can play your tape with the sync track set as the master and add virtual tracks on the computer. Most sequencer software allows tons of tracks. Using a midi keyboard or another midi controller you can play along and build up the tracks. It doesn’t have to be elaborate. You could just add some horn licks, strings or a piano.
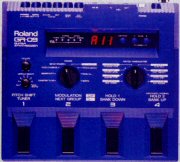
You don’t have to mortgage your home either. There is always a lot of used equipment around. I check out the pawnshops, classified ads, and eBay. One of my finds was an old Ibanez Xing MIDI guitar model IMG2010 circa 1986. It also had a rack-mount MIDI converter MC1. I bought it with a Roland MT32 sound module. The guitar is a pretty decent guitar. As a MIDI controller, it is limited. I would not recommend it for live use as the tracking is a bit slow. Then I bought a Roland GR-09 with the GK-2A pick. It tracks very well. It’s got a great sax sound. Being that I am not a keyboard player it is much easier to input notes into a MIDI sequencer using my guitar.
Always remember that today’s hottest technology will be tomorrow’s old junk. By being a few steps behind the times, I have all this great gear that was hot a few years ago and I got it for about a third the cost. You could use a good sound card as a multi-timbrel sound module. The old Sound blaster Live and Audigy put out some reasonable sounds. You can even play using your computer keyboard as an instrument. Some years ago I bought DS330, a BOSS sound canvas sound module better known as Dr. Synth. Unfortunately, it was discontinued. It has 156 tones and 8 drum sets. Its demo will show you what amazing arrangements can be done.
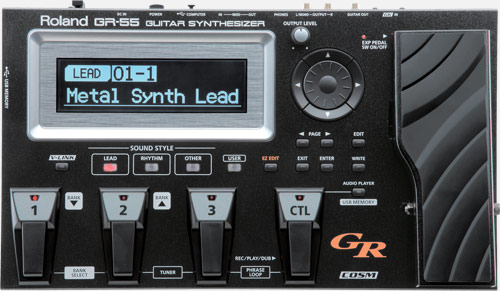
Current Guitar synths
Roland latest Guitar synth is the GR-55
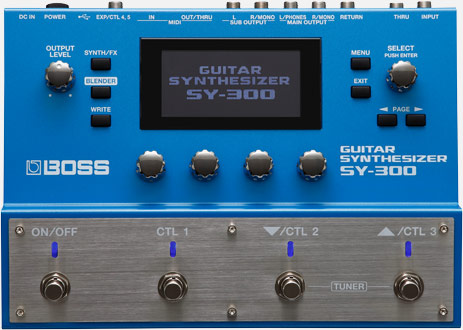
Another interesting Guitar synth is the Boss SY300. It requires no special pick-up as the Roland’s do.
Once you get your feet wet you will realize that you want or need MIDI expanders and MIDI mergers etc. but if you look hard enough someone is always upgrading and willing to get rid of their old stuff at quite reasonable prices.
The easiest way these days to hook MIDI devices that have MIDI ports is to buy a USB to MIDI cable such as the E-MU. Beware of cheap Chinese MIDI to USB. I bought one and it never worked.
Samplers etc.
Nowadays we have bigger computers with large hard drives that cost a fraction of what sampler used to. But you may still want to use a hardware sampler in a live situation.
Briefly, I use a drum sample to create a song on the computer. You can start with one bar and copy it as much as the song requires. Audio samples can be manipulated by stretching etc. Then decide to add fills etc. You could rebuild the complete trace using MIDI or even record a live drummer.
There are tonnes of free samples available everywhere. I recommend magazines such as Music-tech and their sister publications. Besides having great tutorials they give you tonnes of samples such as drums, horns, keys strings, etc.
Samples are actual recordings of instruments. There are samples recorded for several notes at several positions. For example, you can’t take a sample of a low E string on a guitar, and expect by manipulating the sample you would have a convincing high E sound.
Also in the case of a violin, you would want bowed samples and plucked samples, vibrato, and none vibrato, etc.
Samples sound very convincing when used in the background as opposed to soloing them.
Also, remember that if you are playing a piano sample, try not to attack like a guitar player. Don’t play a sax sample like a pianist.
Latency (wait and see)
Although you could use a regular sound card to record your music you really need a system that has low latency. This is required to be able to monitor what you previously recorded in sync so that you can over-dub more tracks. Latency is a fancy pants word that means delay. When delays are too long it is impossible to play along with previously recorded material. Look into Asio4all. If you have older hardware. It may help you.
Sound Cards with ASIO drivers have low latency but do not completely eliminate latency. This is livable. In a worse case, it will sound like a slight echo.
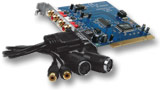
There are both USB and Firewire interfaces. Most recent PCs have USB connectors but Firewire connectors are still relatively rare. If you want to use a Firewall interface & your PC doesn’t have a firewire input, you can find a PCI fire-wire adapter dirt cheap. Fire-wire is going out of favour as USB 2 and USB 3 can keep up with the data flow.
Most basic “Pro” cards have two in and two out, if you need more inputs be prepared to pay a lot more. Another point is that these cards do not have integrated wavetable sounds. So you will need a virtual sound module if you plan to use MIDI. Sonar for example has a sound module built-in.
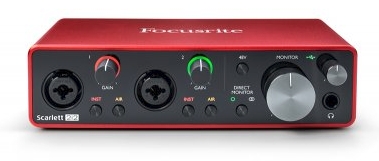
Most recent motherboards contain fewer if any PCI slots. So the way to go these days is with a USB interface such as the Focusrite Scarlett series.
.
In the old days, a band would assembly in front of 1 microphone and they would record directly to disc. Multi-tracking tape was later developed by Les Paul The guitarist.
Digital recordings take this a step further with virtual tracks.
A typical session could be you singing and playing guitar with both parts being recorded into your PC. It would be advisable to use a click track so that future overdubs can be done in sync.
Old Analog tape tricks
Here is a little history lesson and maybe some tips on tape machines. I started with a 2 track tape recorder that had only one tape head. I could record a track & then listen to it and record another track and it would be in perfect sync. Using “sound on sound” I could add track 1 to track 2 while adding a new live track. In a perfect world, you could do this indefinitely but it wasn’t a perfect world. Every time you re-record a track (bounce or super-imposing) you lose frequency response and it would build up noise. This is referred to as generations. When working with 15 IPS, generation loss is somewhat minimized. This way groups such as The Beatles were able to record 2 tracks on one machine and then re-record those 2 tracks along with 2 new tracks onto a second machine. Sergeant Pepper’s was done this way but using 4 track machines.
On home recorders running at 3 ¾ or 7 ½, the generation losses were great yet we all tried to overdub this way before the TEAC revolution. Here is a little trick I used to use in my reel days. I would record a band using all 4 tracks at 15 IPS on my TEAC A3340. Then I would do a test mix. When I was satisfied with the mix I would switch my 3340 to playback at 7 ½ IPS and record the 4 mixed tracks tape onto an Akai 2 track running at 7 ½. It sounded pretty weird listing to the tracks at half speed. Then I would spool the 4 mixed tracks back onto the 3340, switch back to 15 IPS and voila, I had 4 tracks mixed down to 2 with 2 open tracks.
Digital Audio recording tricks
Now with computer audio, you can forget all these problems. Now is the time for new tricks. As we all know music is repetitive. Let’s look at a simple 12 bar blues or rock song. Why record repetitive rhyme guitar or bass for the entire song? Use a click track and record the changes once. Then in the software, you copy & paste the backing track to fill the whole song. Instant backing track. Need to add a lead break after the 2nd verse. Just put your cursor at that point and start recording. Cueing is not necessary. Do the same with the bass and drums. Once your song is together you can tweak it to perfection. You can add effects and listen. If the effects are no good try something else, it takes seconds. If your vocals are a little flat, there are several plug-ins on the market to correct the pitch. On a recent recording, I had a beginning part, a middle part, and an ending that all required the same grungy fuzzed-out sound. There was also a clean guitar sound in the verses. In the middle, there is an uptempo part that requires another guitar sound for chords. I did all the recordings in sections. I did the beginning middle and end parts. Then I did the verse part and finally the middle section. I just jumped to the part that required my playing. I also did doubling where required. I then sent my files to the cloud where my bandmate downloaded them and mixed them in with the rest of the band. I have never played with the drummer who is on the final mix.
My guitar parts were recorded direct via Focusrite Scarlett 6i6 using an old Vox Tone Lab.
Live recording tricks using an older technology.
Remember this site is aimed at people with more time & talent than money. So sure there are better ways to do things if you have lots of money. I always liked to record live shows. Being both a musician & a recording engineer does pose some problems. Recording from somewhere in the hall never gives good results. Recording directly from the mixing console also isn’t satisfactory. You end up with loud vocals and possibly loud keyboards but hardly any rhythm section or guitar. If the sets are 1 hour long or more and if there are 3 or more sets who is going to feed a tape machine and do you want to have someone spill beer on your computer. One solution that I used with great results was to use a Hi-Fi-stereo VCR set to EP mode as the recorder. You can get 6-8 hours of high-fidelity recording without adding a new tape. The frequency response is better than most reel-to-reel recorders at about 90 dB s/n ratio. I used 2 ambient mikes one left & one right to capture whatever didn’t get picked up through the mixing board. I used a little stereo mixer to mix down the source channels to two tracks for the VCR. The results were pretty amazing and much better than someone in the audience doing the recording. You can pick up a used Hi-Fi stereo VCR for $ 5.00 at a yard sale. Another alternative is a Mini-disk recorder or even better a Laptop.
Using a camcorder as the VCR will not only document the audio but you’ll have a video to boot. You’ll need a Camcorder with audio or mike input. You probably need an attenuator to balance the line outputs to mike inputs otherwise you get distortion. Not being able to find a stereo attenuator, I designed and built my own. See my Project page for details on the 40db pads.
Just a note about the M-Audio Fast Track. I always try to load the latest driver and I did so for the Fasttrack.I began to have all kinds of issues. Freezing for one thing. It got to the point where I started shopping for a replacement. Then I decided to try it on my secondary computer. I worked fine. I checked to see what drivers were installed. Low and behold they were older drivers. So I rolled back my driver. I’m now using version 6.1.7601.18208 which was issued in 2013. The file is named Fast_Track_USB_Installer_6_0_6_77176 . So far everything is fine. So it doesn’t always pay to upgrade drivers when you have no issues. Avid now owes the Fast Track files. Find the M-Audio Fast Track drivers here.
Fix some common audio problems
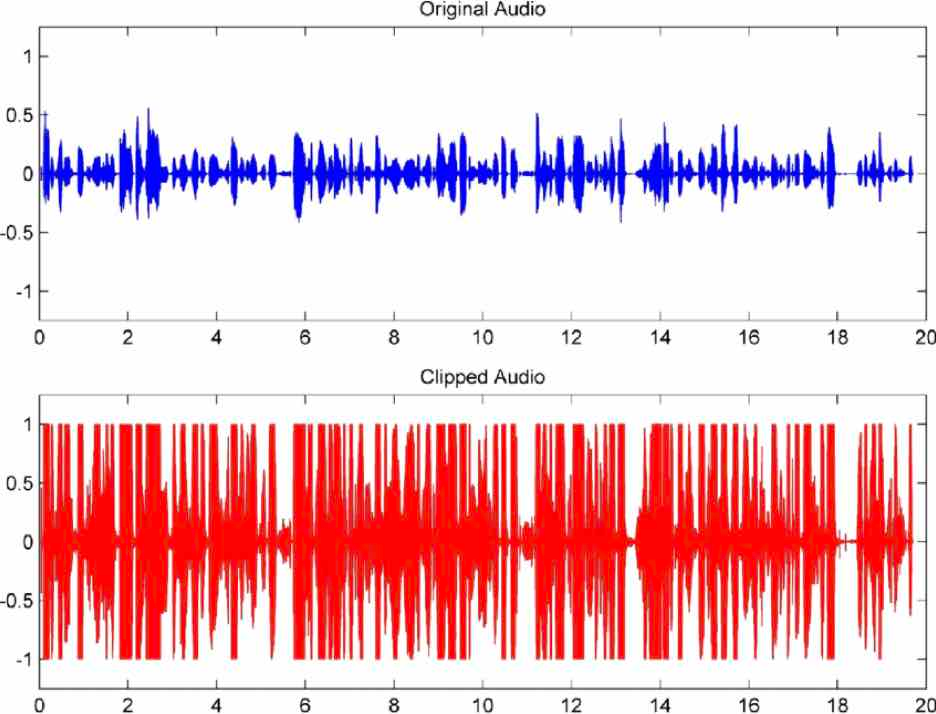
Anyone that works with sound or in music production knows how frustrating it is to find your audio distorted after a long day of tracking. Technically,
Source: How to Fix Distorted Audio and Clipping Audio – CrumplePop